 Alec Young
 These guides cover only how to use our Invoicing tools to create your invoices and vendor statements, any verification of accuracy or tax compliance must be handled by you and a Chartered Accountant.
Before proceeding with this guide, we heavily recommend reviewing the following guides if you haven’t already:
Manually generating and syncing invoices in VendorPlus+ Invoicing
As a quick reminder, if you have VendorPlus+ Invoicing’s Auto Sync option set to No, you must log into VendorPlus+ and manually run the Invoice sync to Xero.
This can be done from the Invoicing > Auctions menu inside VendorPlus+
Step 1: Accessing the Invoicing > Auctions menu in VendorPlus+
From anywhere in VendorPlus, scroll to or look at the top of your screen and float your cursor over the Invoicing option, then click Auctions:
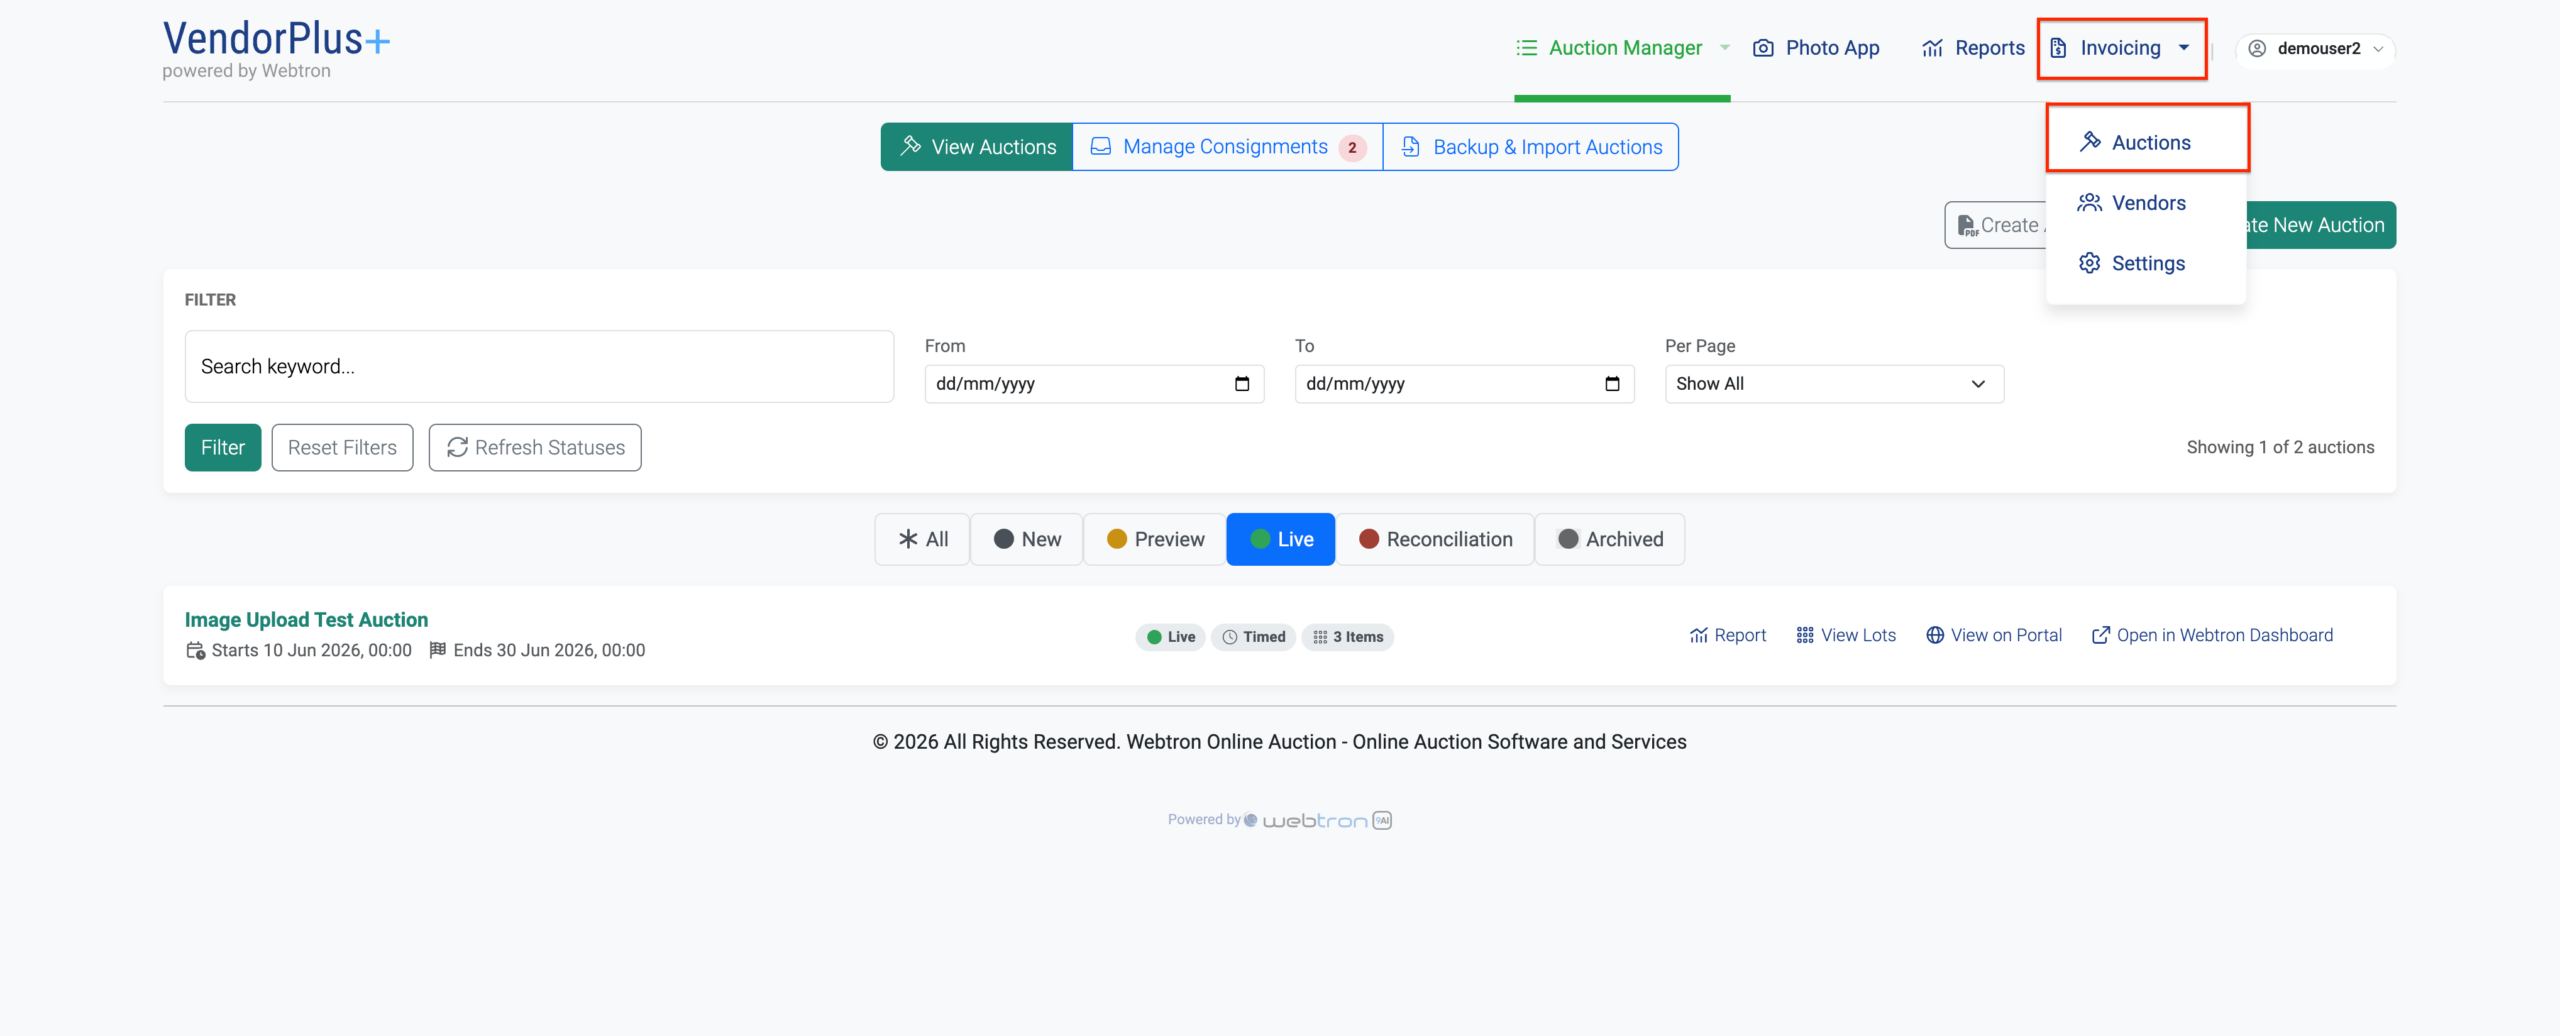 Float your cursor hereClick here
- Float your cursor here
- Click here
Once the Auctions menu loads, you’ll see a table containing each of your Auctions, displaying their Title, Dates, Auction Type, # of Items and current Status (Preview, Live, Reconciliation, or Archived):
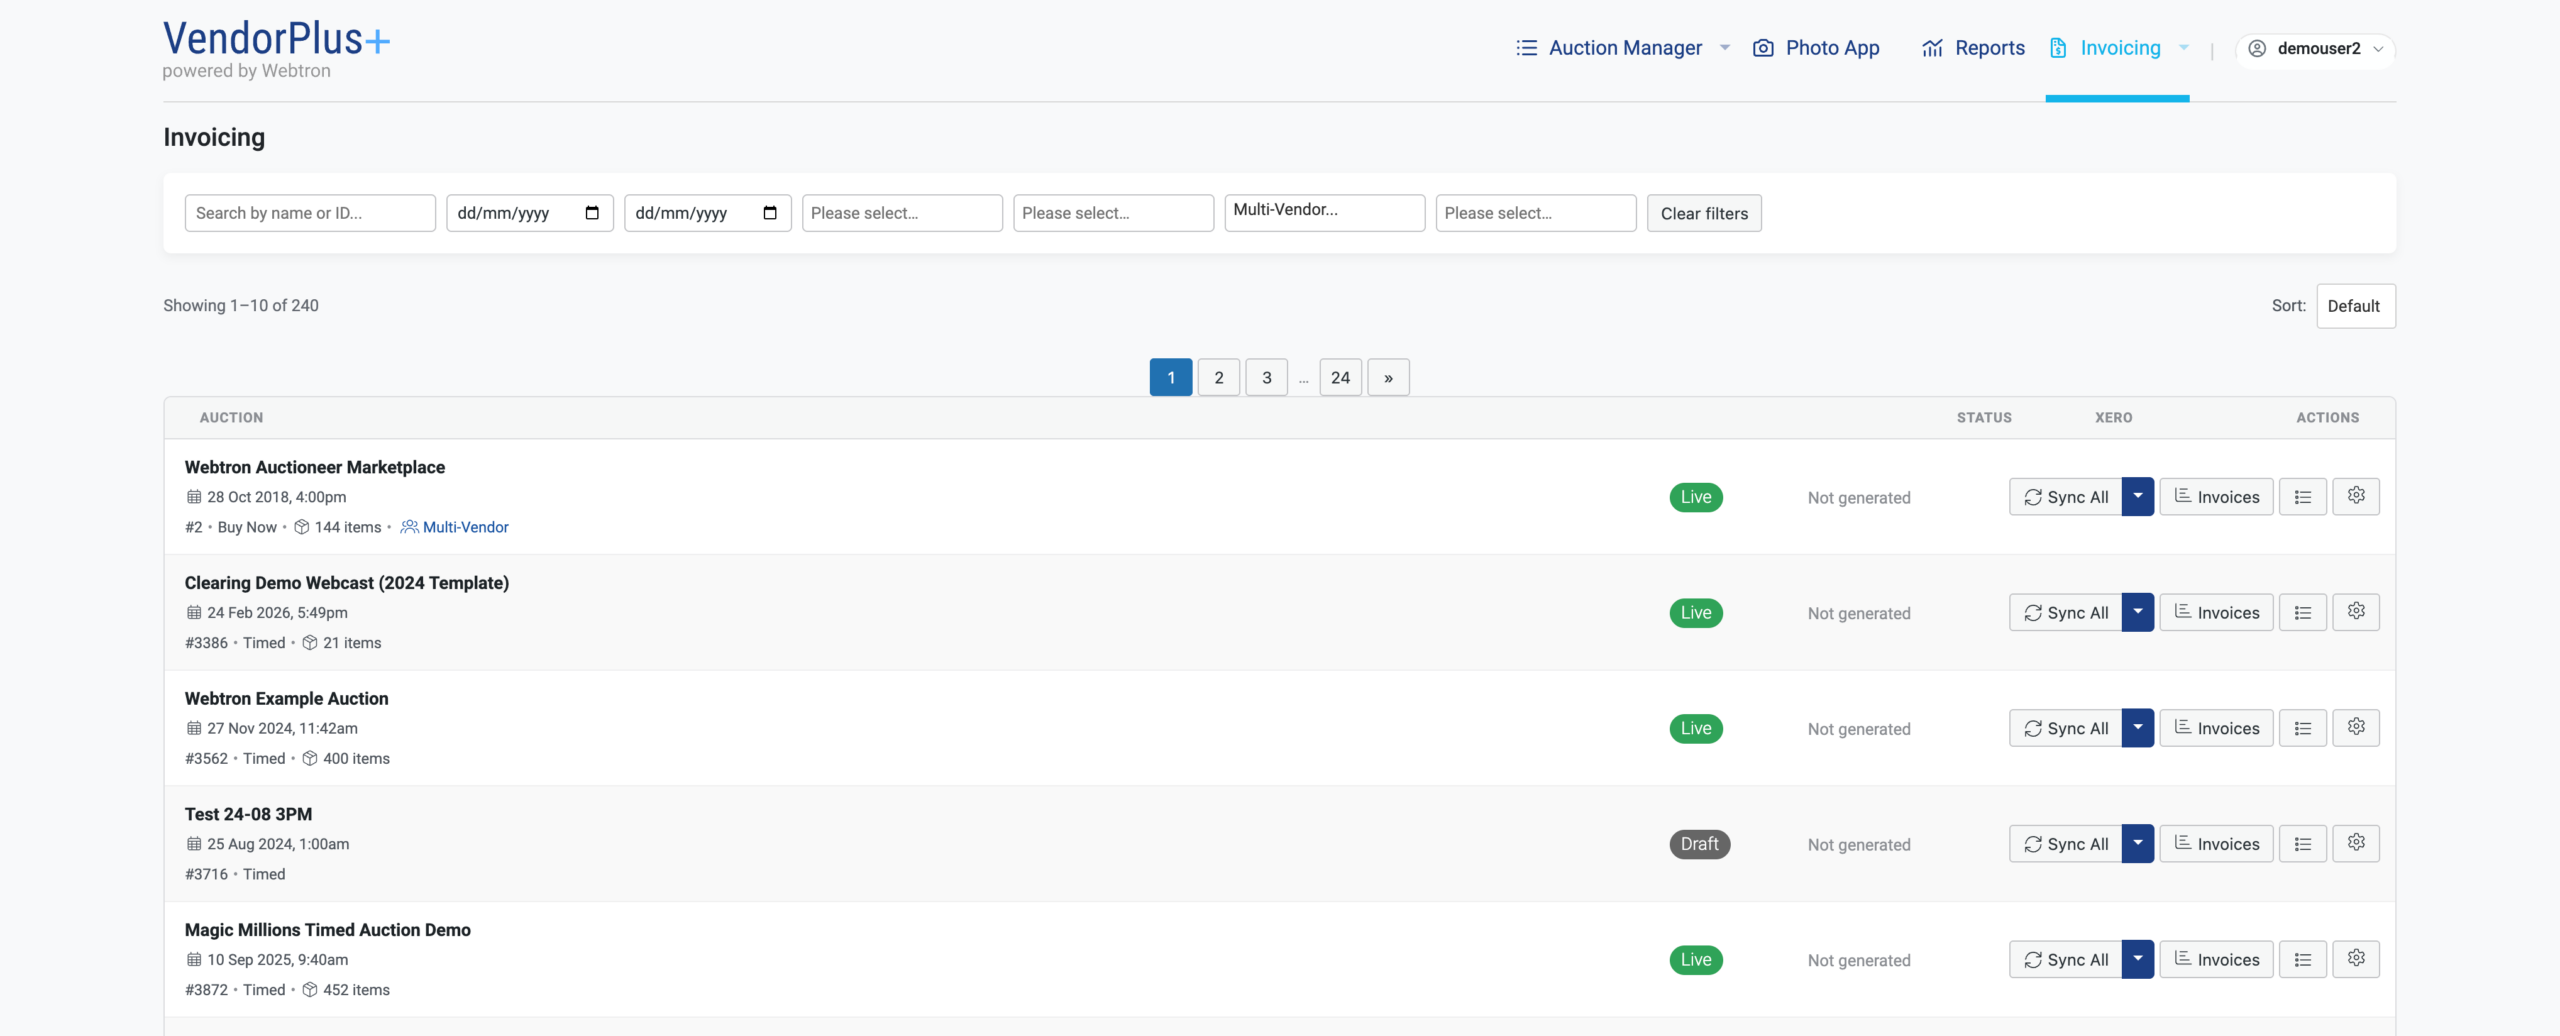 Auction InformationAuction StatusXero Sync Status
- Auction Information
- Auction Status
- Xero Sync Status
Next to the Auction Status column, you’ll find the Xero Status column. This will specify if Invoices have been generated and/or synced, and will initially display “Not generated” for each of your newly reconciled Auctions.
Step 2: Open the auction’s Settings panel
We strongly recommend checking each auction’s Settings panel before generating any Invoices or Vendor Statements, especially if you are using Multi-Vendor (Split Invoice by Vendor) or your Commission rates change auction-to-auction. To review these options, click the Settings icon at right-hand edge of each Auction:
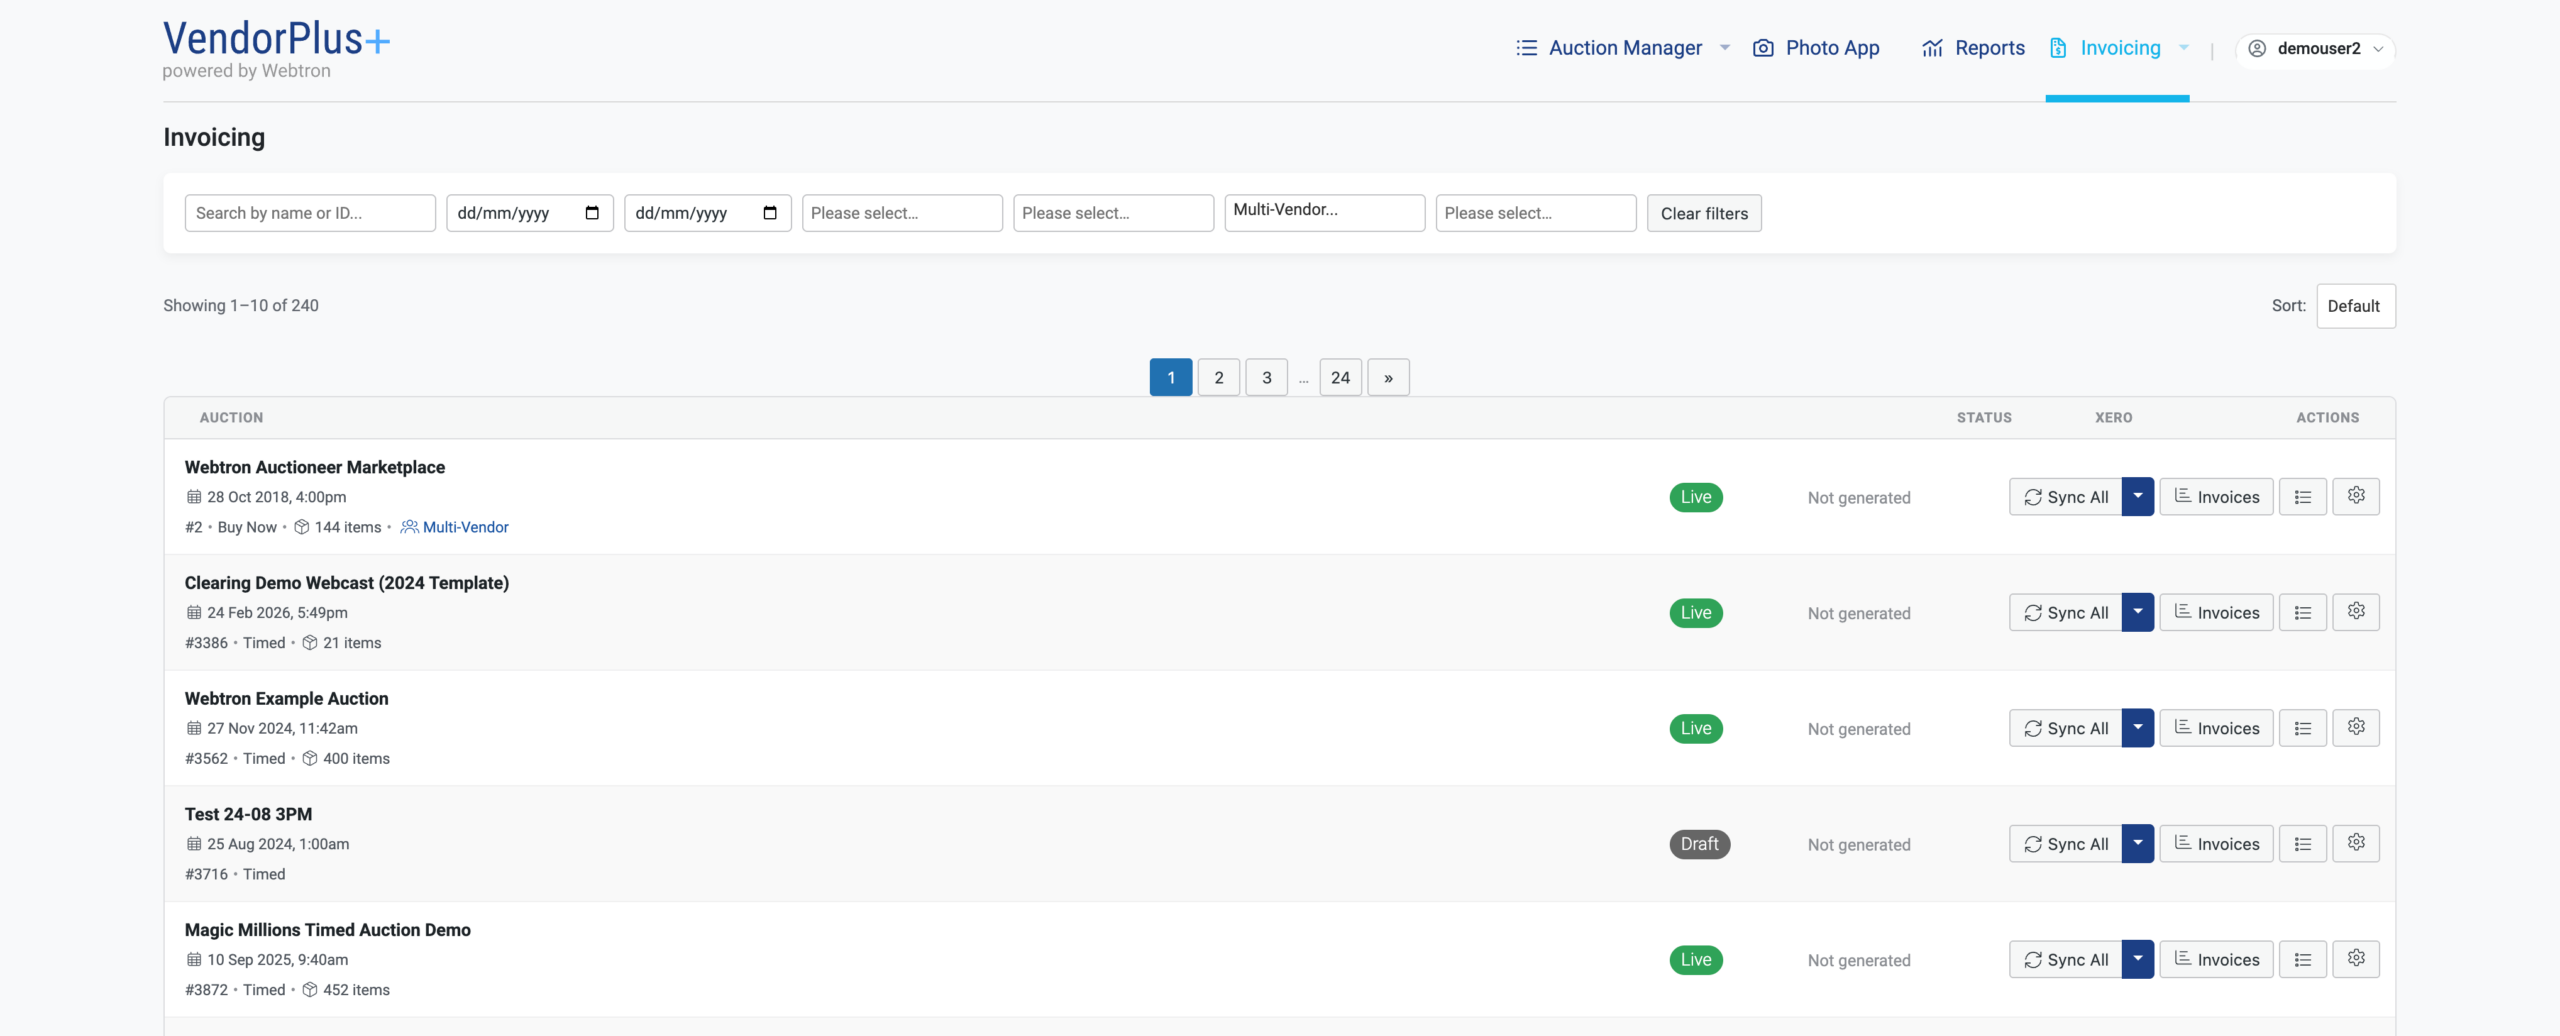 Click here to open the Auction Settings panel
- Click here to open the Auction Settings panel
Check each of the settings listed in the 4 sections (Commission, Auction Settings, Buyers Premium Rules and Additional Settings). For a full breakdown of each option, click here.
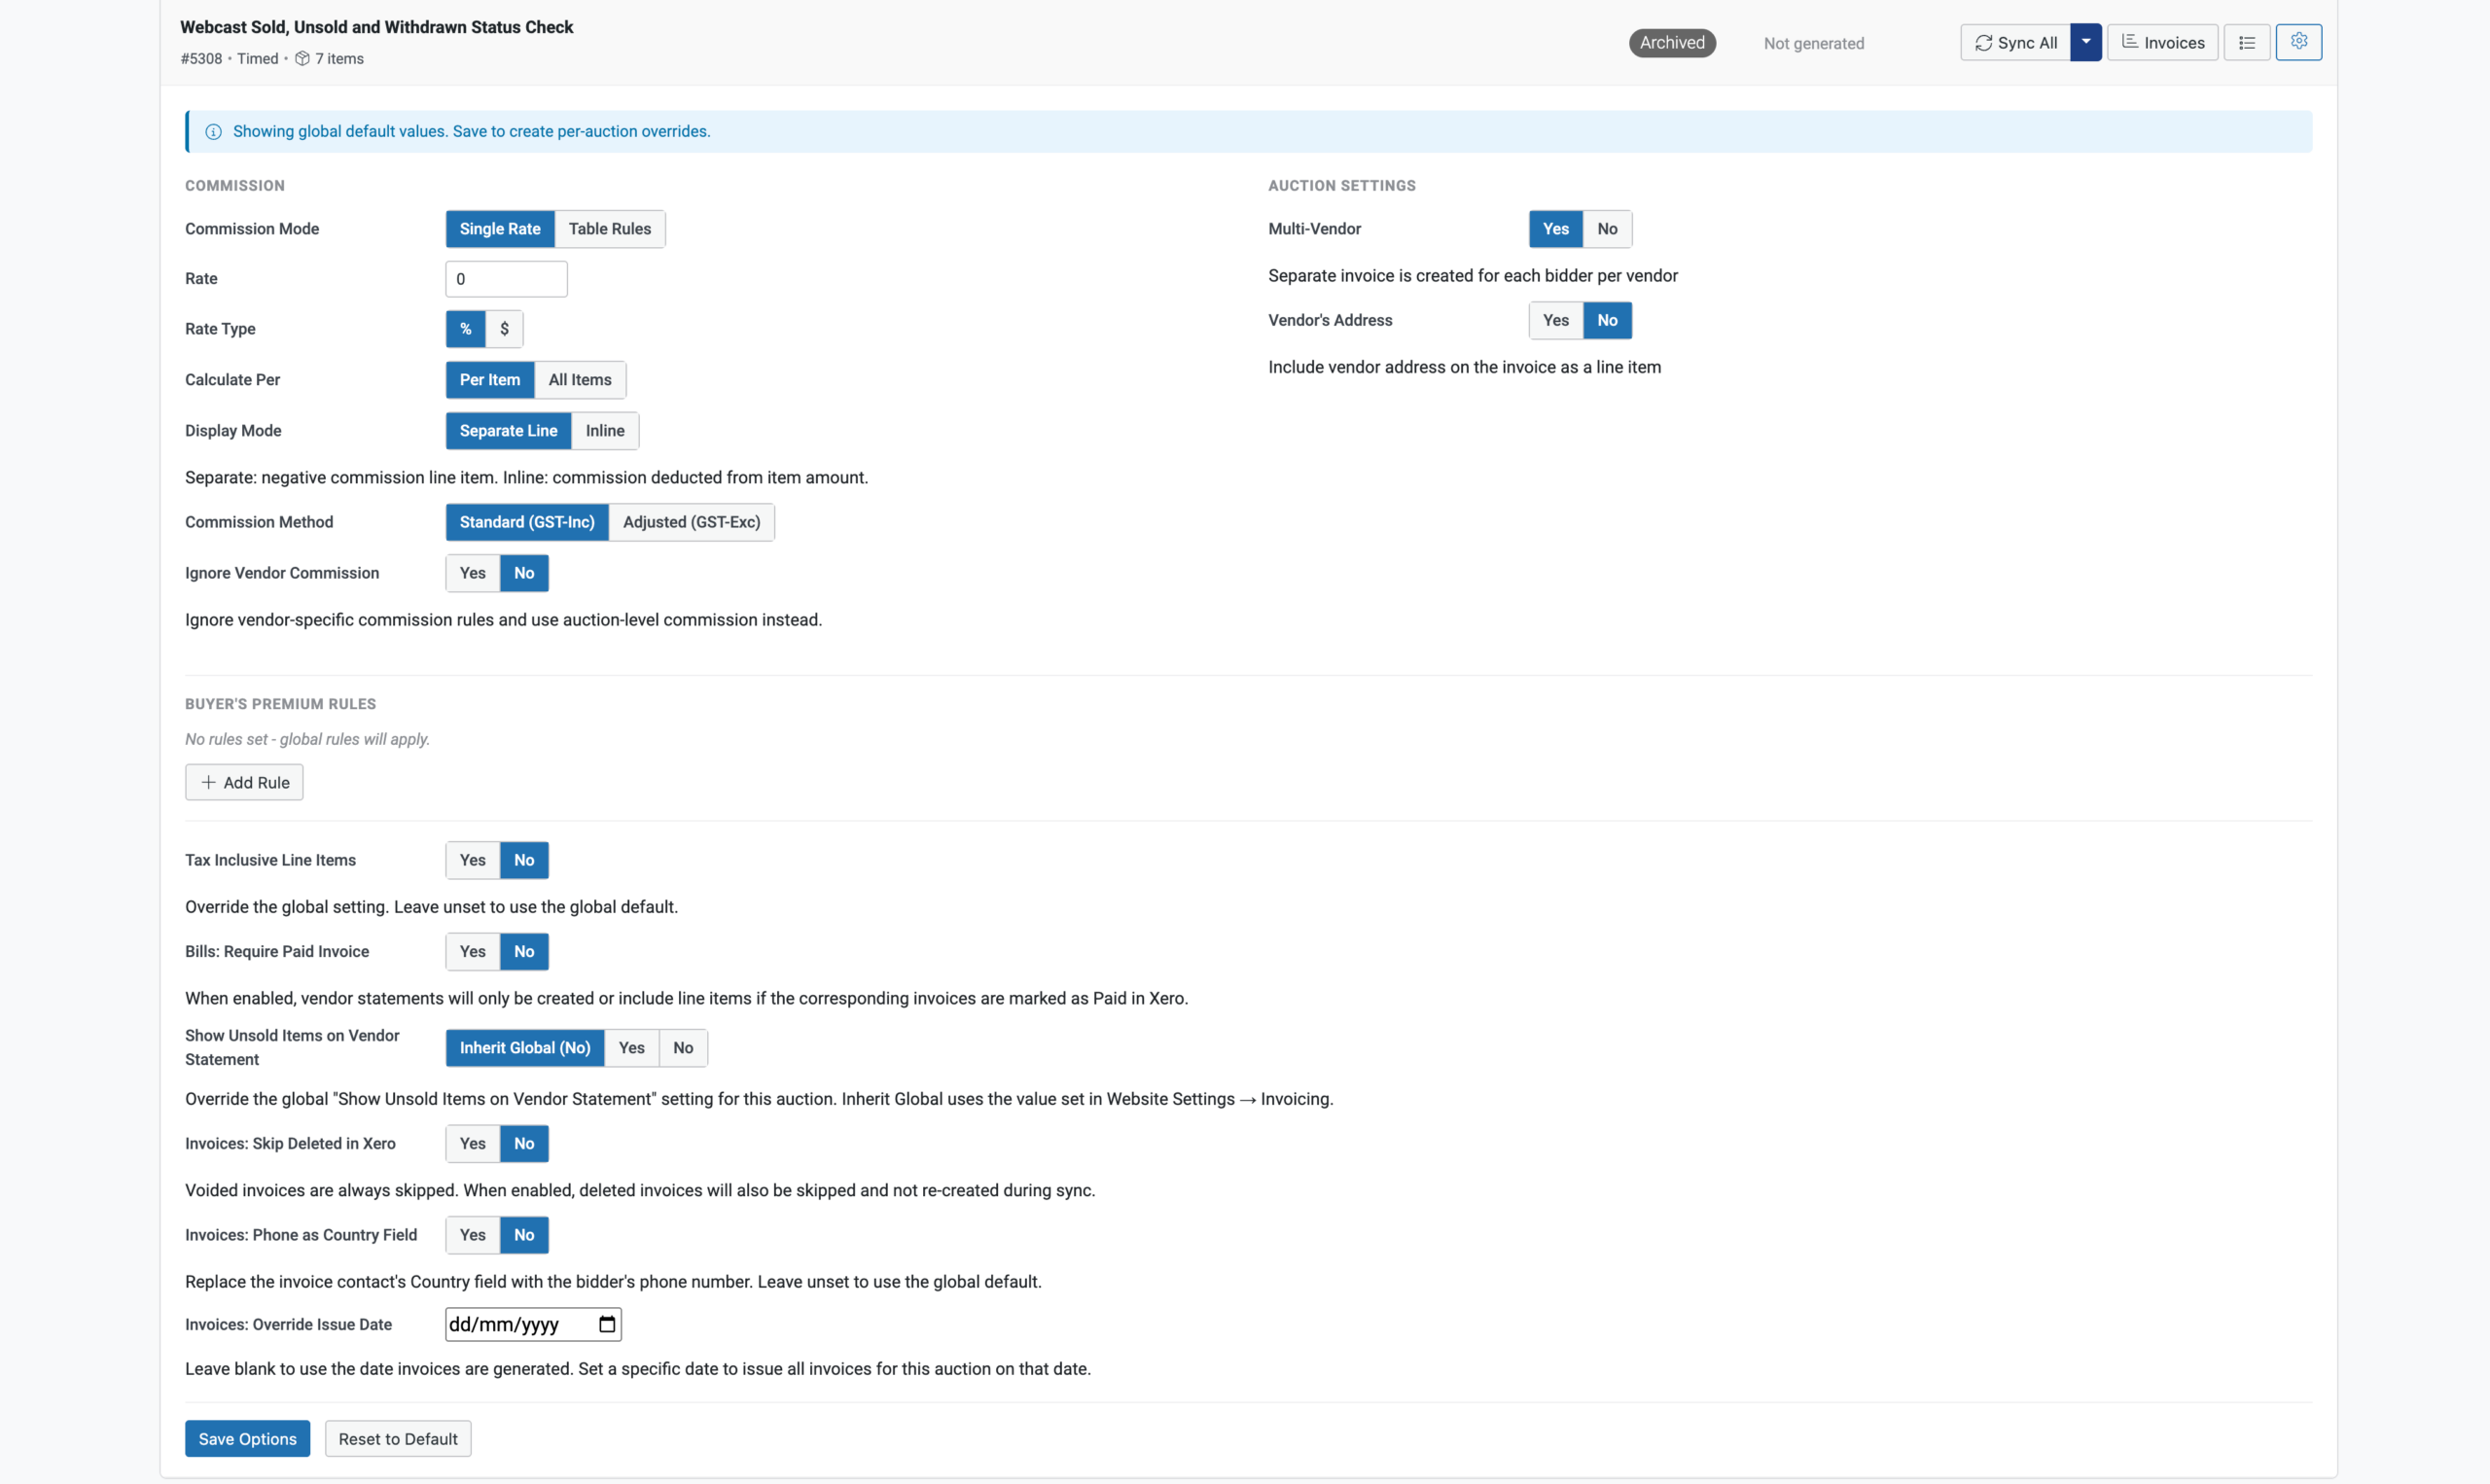 Commission SettingsAuction SettingsBuyers Premium RulesAdditional Settings
- Commission Settings
- Auction Settings
- Buyers Premium Rules
- Additional Settings
Step 3: Check your Invoices Preview
Once you have reviewed the Settings panel, look slightly to the left and click the Invoices button.
You’ll briefly see a “Fetching from Xero” message, this will then be replaced by 6 panels (Invoices, Total Invoiced amount, Invoices Paid amount, Outstanding amount, Vendor Statements count and Statements Paid amount), and 6 tabs (Preview, VS Preview, Invoices, and Vendor Statements).
Click on the Preview tab if it doesn’t open automatically, this will display a preview list of the Invoices that will be generated and synced to Xero, with each row representing an individual Invoice – displaying the Invoice Reference Number, Bidder, and Estimated Total:
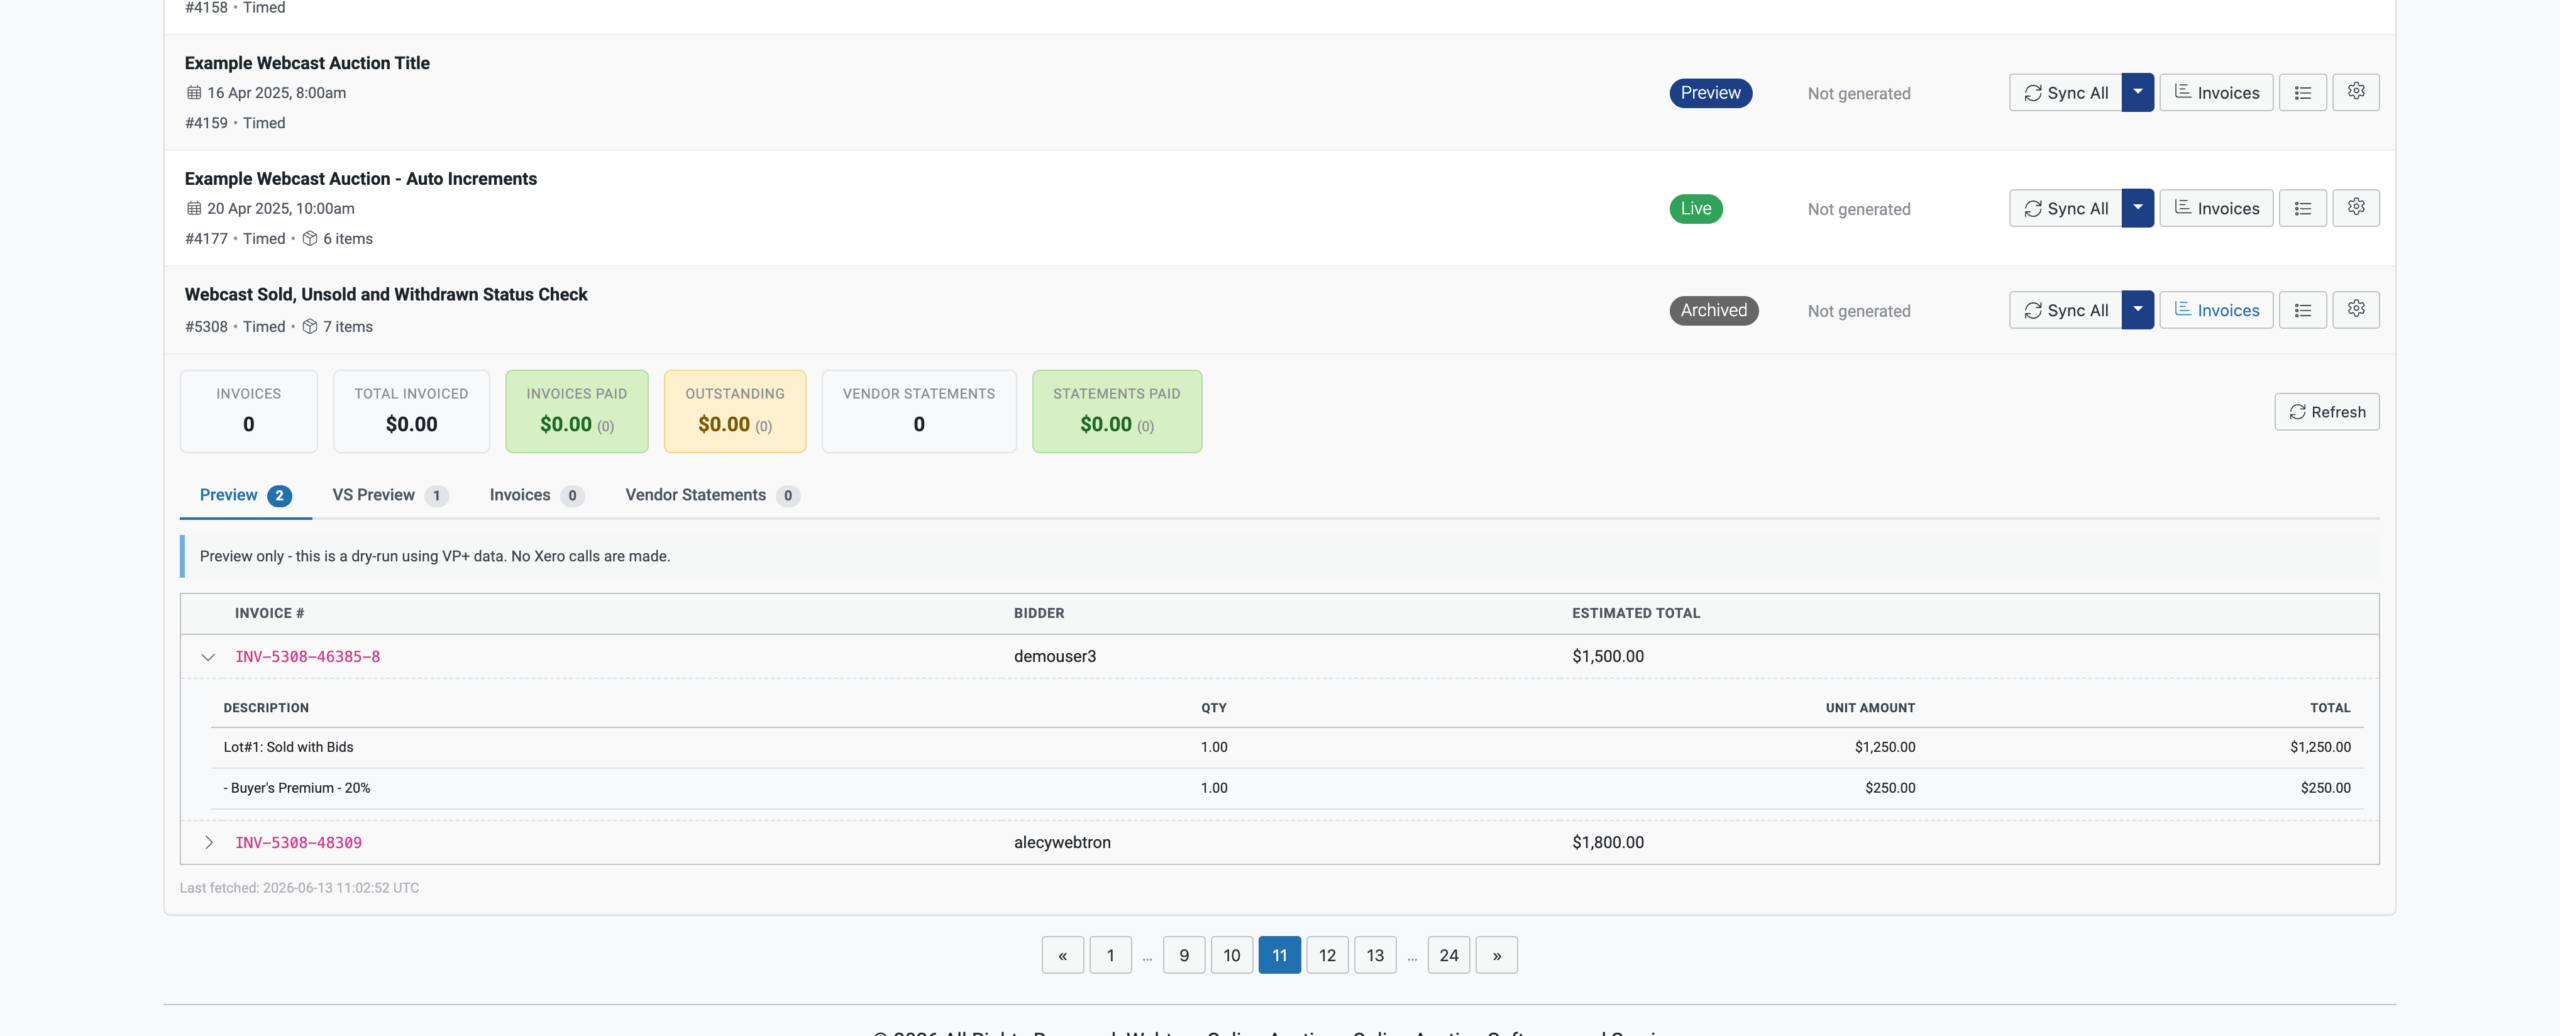 Click here to open the Invoices PanelClick here to open the Invoices Preview tabClick here to open the Invoice Line Items list
- Click here to open the Invoices Panel
- Click here to open the Invoices Preview tab
- Click here to open the Invoice Line Items list
We recommend clicking on the arrow at the left-hand edge of each Invoice Preview, this will open the Line Items preview list for that Invoice, including the Items and Unit Amounts (Hammer amount) that Bidder/Buyer has won each Lot for, with a sub-line item specifying the Buyers Premium for your Auction.
Step 4: Generate and Sync your Invoices
Once you have review a few of your invoices, you have two options:
- Click the Sync All button to generate and sync both your Invoices and Vendor Statements, or
- Click the dropdown button next to Sync All and, under Sync Individually, click the Invoices button:
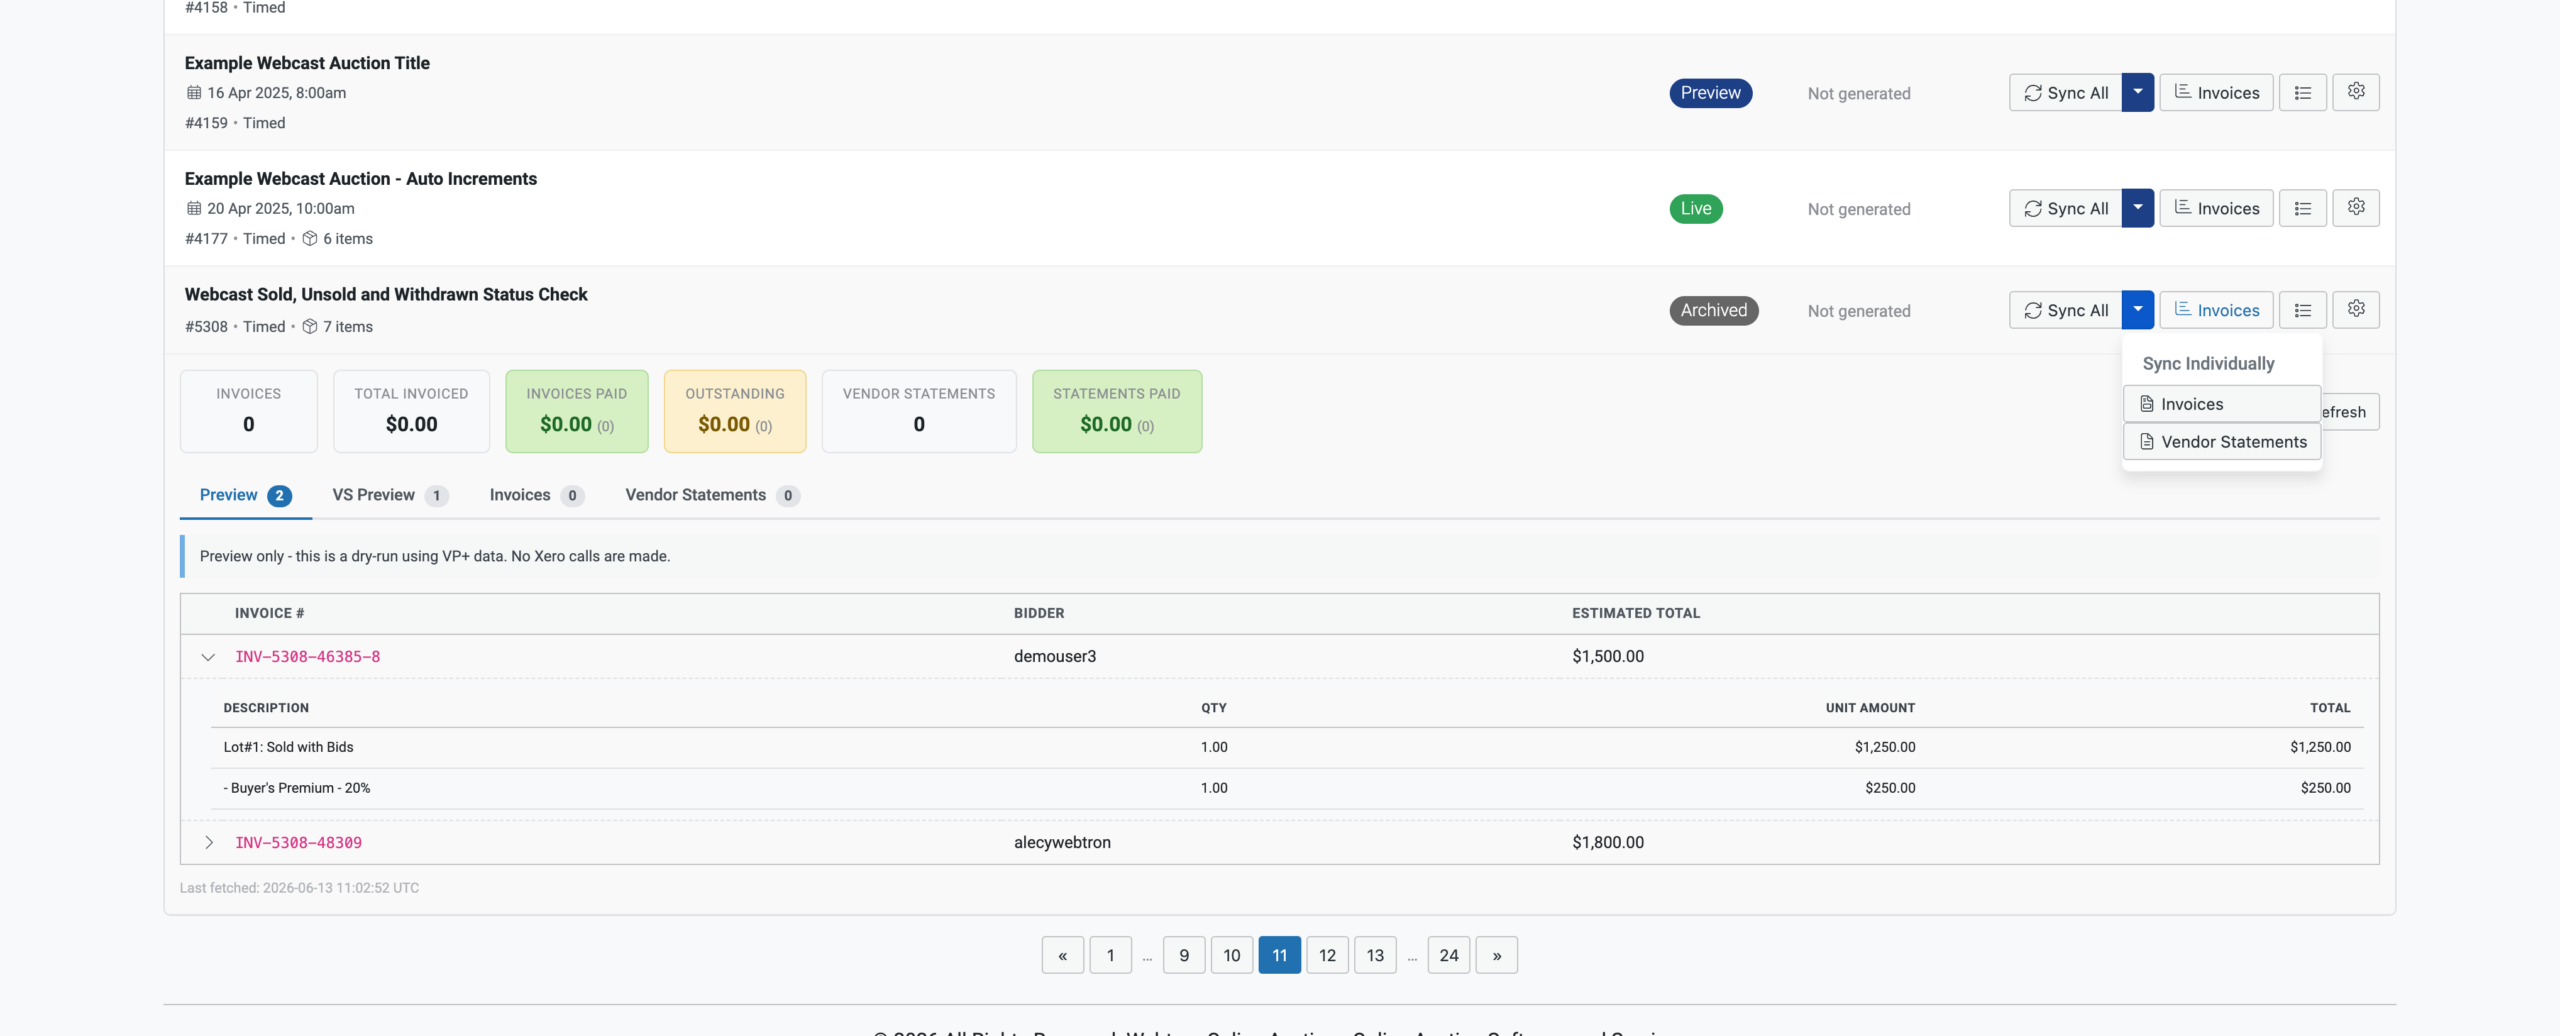 Click Sync All to sync both Invoices and Vendor Statements to XeroClick the dropdown arrowClick the Invoices button to sync only Invoices to Xero
- Click Sync All to sync both Invoices and Vendor Statements to Xero
- Click the dropdown arrow
- Click the Invoices button to sync only Invoices to Xero
Either option will trigger VendorPlus+ to begin generating and syncing your Invoices over to Xero. Depending on the number of Invoices, this process may take up to 30 seconds, and you’ll be moved to the Invoices tab automatically once complete.
The Invoices tab will then display the complete list of Invoices generated and now available in Xero:
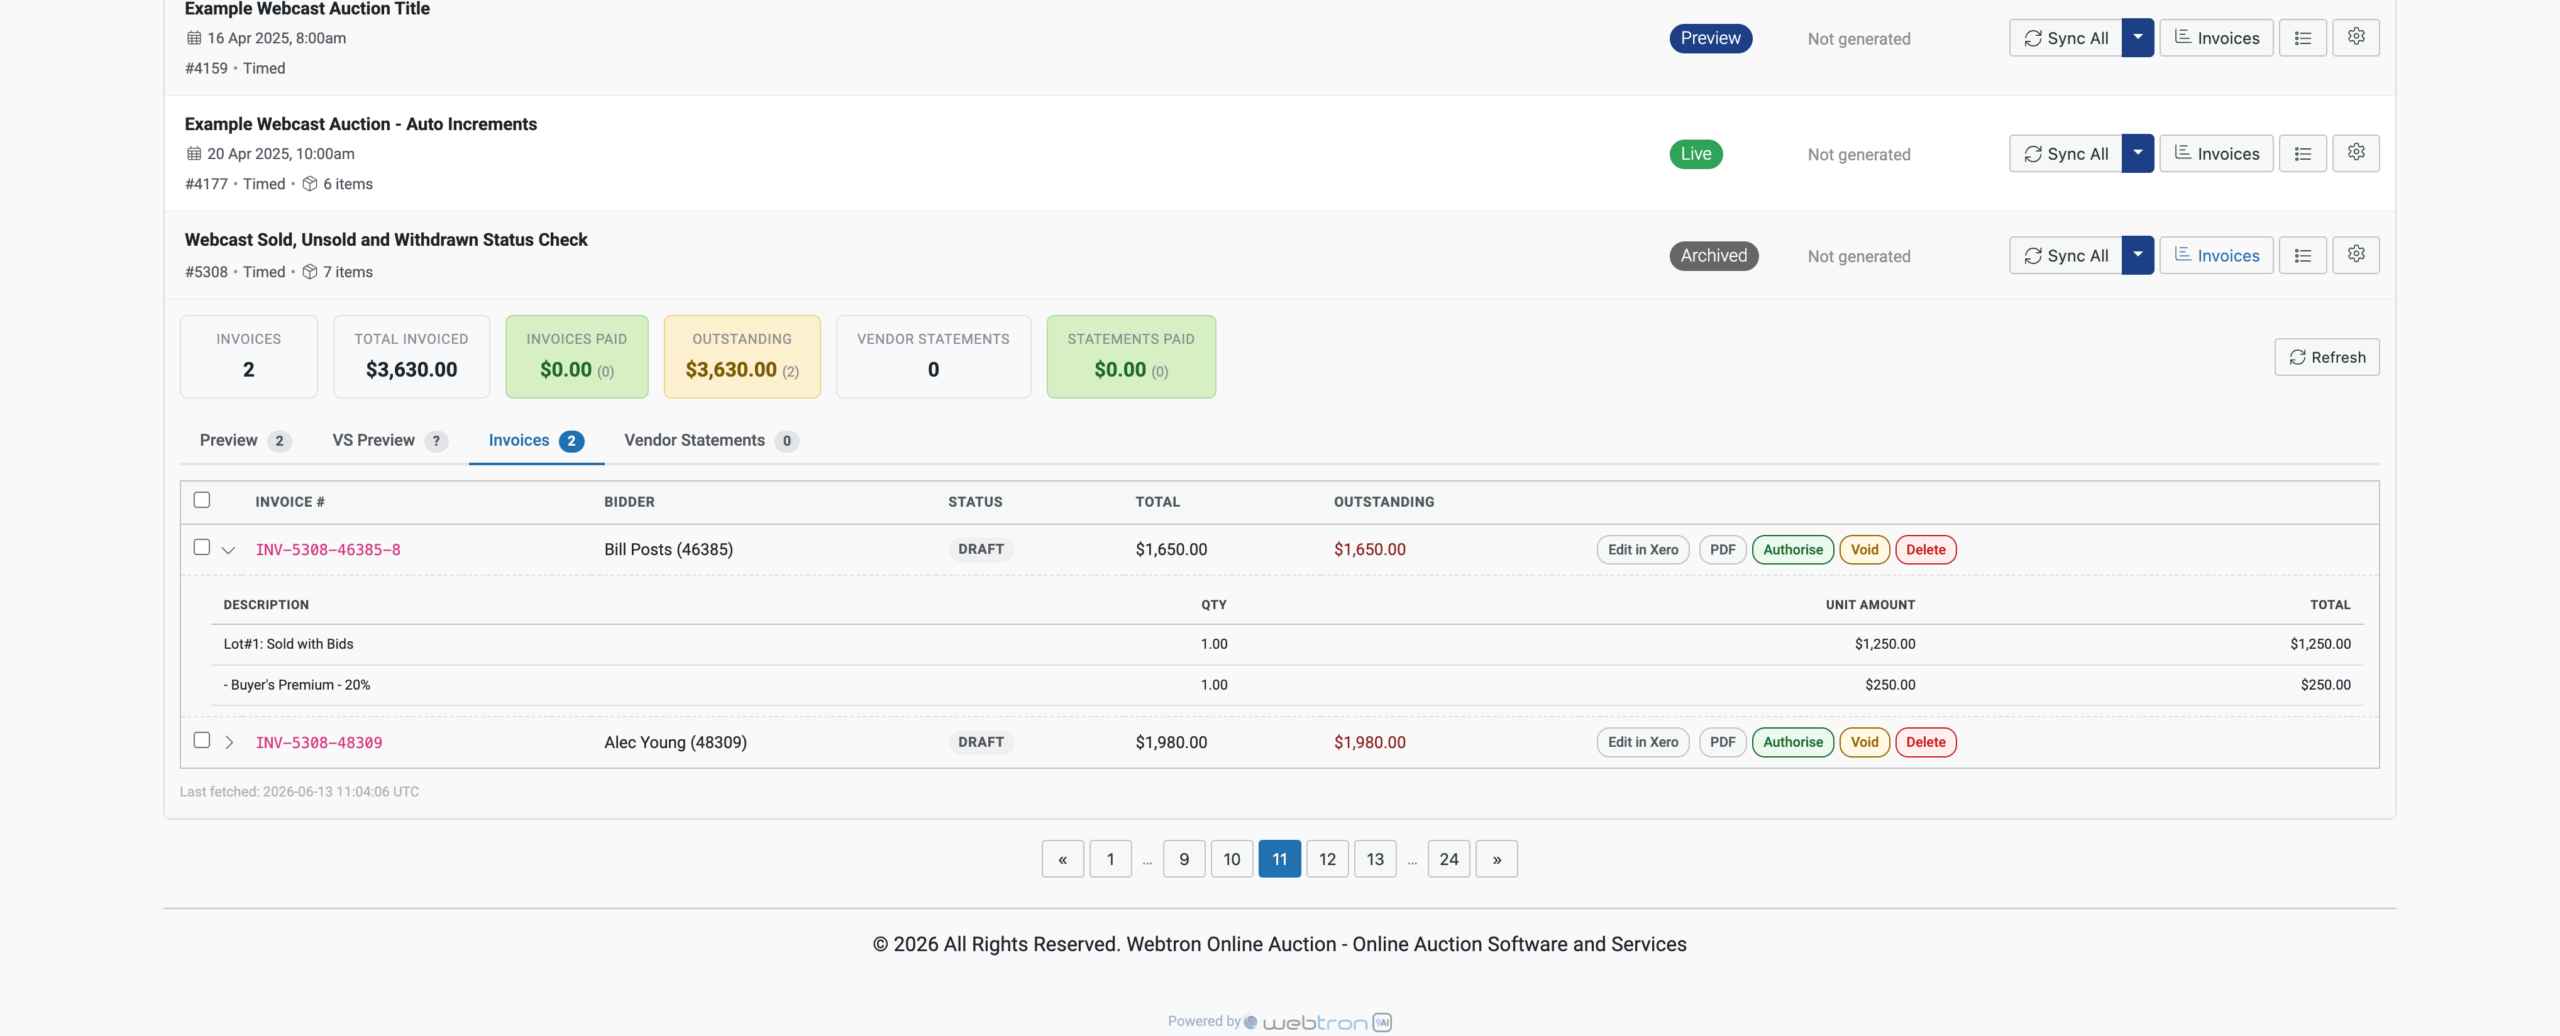 Click here to open the Invoices panelClick here to open the Synced Invoices tab
- Click here to open the Invoices panel
- Click here to open the Synced Invoices tab
Step 5: Review your Invoices in Xero and Send
You’ll now need to open the Xero website or app on your device and log in to your Xero account, you can shortcut this by clicking the Edit in Xero button on any of the Invoices here:
Click here to edit this Invoice in Xero- Click here to edit this Invoice in Xero
Once logged in to Xero, click on the Sales option at the top of your screen, then click Invoices:
Your newly created Invoices will be in Draft status, click into any of the Invoices to check their details, and when ready, select your Invoices and click Approve:
Your Invoices will then move to Awaiting Payment tab, open that tab and tick your Invoices again, then click the Email button at the top-left of the Invoice list and follow the prompts to send your Invoices out:
In the next guide, we’ll cover how to mark your Invoices as paid and reconcile payments manually.